

A reverse proxy operates as an intermediary among client devices, such as online browsers, and the backend servers that manage requests. When the client submits a request, it reaches the reverse proxy, which then selects the most compatible server to evaluate the request. After the server responds, the reverse proxy conveys that message to the client. Through a reverse proxy, you can hide origin servers, cache content, manage SSL encryption, and balance loads among various servers.
On Linux, there are multiple techniques for deploying reverse proxy, including Nginx. It’s a dynamic web server, known for its lightweight design and flawless execution. By enabling Nginx proxy, you can distribute traffic, improve server privacy, and boost performance—all while maintaining a simple setup.
This tutorial provides a step-by-step walkthrough for setting up Nginx reverse proxy on an Ubuntu system.
Why Choose Nginx as a Reverse Proxy?
Nginx maintains an exceptional balance between features and performance. It meets various requirements while ensuring your website is secure.
Performance and Efficiency
Nginx is built for speed. Its architecture allows it to process thousands of simultaneous connections while using minimal memory. Compared to other proxies, Nginx delivers static content faster and manages system resources more accurately.
Scalability
Nginx contains native load balancing capabilities, allowing it to allocate inbound traffic over various instances of your program. Also, when one server becomes overwhelmed, Nginx transfers traffic to others with more capacity.
Flexibility and Customization
Nginx reverse proxy configuration language is both powerful and intuitive. This flexibility enables you to implement complex routing rules, manipulate headers, and integrate caching with ease.
Cost-Effective
Nginx is more cost-effective than other solutions. Its efficiency means you can handle more traffic without investing in expensive hardware. Moreover, Nginx open-source edition is available at no cost, making it an ideal pick for businesses/startups with low budgets.
Ease of Use
Compared to alternatives like Apache or HAProxy, Nginx offers simpler configurations and has extensive documentation available online.
Prerequisites
Ensure you’ve this:
- An Ubuntu server (20.04 or 22.04 recommended) with root or sudo privileges
- Basic familiarity with Linux terminal interface
- Text editor like nano or vim
Installation of Nginx
First, make sure your package list is up-to-date and that you’re pulling the latest available versions:
sudo apt updateThen upgrade with this:
sudo apt upgradeInstall Nginx:
sudo apt install nginx -y
Next, Nginx should start automatically. If it doesn’t, you can start service with this:
sudo systemctl start nginxAnd enable it to run at boot:
sudo systemctl enable nginxThis confirms that Nginx is currently operational and will start whenever you refresh your server.
Verify Nginx Status
Launch a web browser and type your server’s IP address or domain name (if set up). If deployment was properly set up, the standard Nginx welcome page should display.
Alternatively, you can also check Nginx’s status with:
sudo systemctl status nginx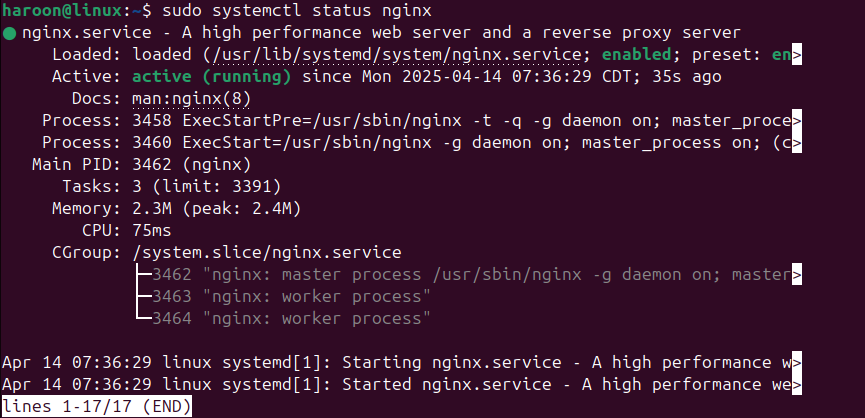
You should see active (running) in the output. Now that Nginx is installed, you’re ready to deploy it as a reverse proxy.
Set Up & Use NGINX Reverse Proxy
Next, set up Nginx to act as a reverse proxy.
Step 1: Backup Your Default Configuration
Before you make any changes, back up the current configuration file. This lets you revert to original settings if necessary. Open terminal and execute:
sudo cp /etc/nginx/nginx.conf /etc/nginx/nginx.conf.backupThis simple backup step ensures you have a safety net.
Step 2: Make a New Nginx Configuration File
Nginx preserves its configuration files in /etc/nginx/. The primary file is nginx.conf, but for site-specific settings, we’ll use sites-available folder.
Let’s prepare a new configuration file with your favorite editor (for example, nano):
sudo nano /etc/nginx/sites-available/reverse-proxyYou can modify reverse-proxy with a name that better fits your app’s vibe. This opens a fresh, empty document in nano.
Now, paste the following basic configuration:
server {

    listen 80;

    server_name your_ip_or_domain;

    location / {

        proxy_pass http://localhost:8080;

        proxy_set_header Host $host;

        proxy_set_header X-Real-IP $remote_addr;

        proxy_set_header X-Forwarded-For $proxy_add_x_forwarded_for;

        proxy_set_header X-Forwarded-Proto $scheme;

    }

}
Where:
- listen 80: Specify Nginx to listen for HTTP traffic on port 80.
- name_of_server your_ip_or_domain: Should be updated with your correct domain name or IP.
- nginx proxy_pass: Sends requests to a backend server working on port 8080.
- proxy_set_header: Directives ensure that valuable header information is correctly passed on.
Step 3: Enable the New Nginx Configuration File
After inserting your configuration, enable it by generating a symbolic link to the sites-enabled folder:
sudo ln -s /etc/nginx/sites-available/reverse-proxy /etc/nginx/sites-enabled/This step tells Nginx to include your custom configuration when it starts up.
Step 4: Test the Configuration
Before restarting Nginx, it’s recommended to examine the configuration for any errors by running:
sudo nginx -t
If the test goes well, you will see a reply that confirms that syntax is valid. If not, error text will instruct you in troubleshooting the issues.
Step 5: Adjust Your Firewall Settings
If you’re running UFW (Ubuntu’s default firewall), you’ll require to enable HTTP (and HTTPS if you’re utilizing it) traffic:
sudo ufw allow 'Nginx Full'This permits both HTTP (port 80) and HTTPS (port 443) traffic to reach your proxy server.
Step 6: Restart Nginx
Now that everything seems in order, restart Nginx with this:
sudo systemctl restart nginxYour Nginx reverse proxy should now be active. All inputs referring to your server’s IP or domain will be communicated to your backend server operating on the specified port.
Testing and Verification of Nginx Reverse Proxy
To validate Nginx reverse proxy integration, launch your browser and visit your domain name or IP address. If you see content from your backend (like a custom app on port 8080), your Nginx reverse proxy is working properly.
You can also simulate a request using curl:
curl -I http://your_domain_or_ip 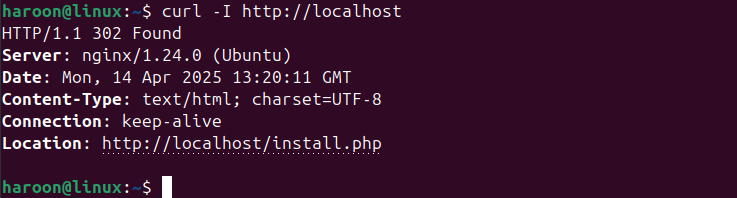
You should check HTTP headers that reflect the settings you applied in your Nginx configuration, such as X-Real-IP and X-Forwarded-For.
If something isn’t working, check Nginx logs:
sudo tail -f /var/log/nginx/access.logReview Nginx’s access and error logs located in /var/log/nginx/. These logs can reveal insights into any conflicts with requests and help you troubleshoot problems promptly.
Installing and Enabling SSL Certificates
In today’s web environment, HTTPS is practically mandatory. Let’s secure our setup with a free SSL certificate by installing certbot and the plugin:
sudo apt install certbot python3-certbot-nginxNext, get and configure the SSL certificate using certbot with this:
sudo certbot --nginx -d example.com -d www.example.comFollow the prompts, and certbot will tweak your configuration to enable HTTPS. It will also configure automatic renewal of your certificates.
After this step, try accessing your site using HTTPS (https://example.com) and verify that everything still works correctly.
Conclusion
You’ve set up a Nginx reverse proxy on your Ubuntu system via the command line. This configuration enhances your server’s speeds and adds a strong layer of protection and scalability to your apps. By choosing Nginx, you’re opting for a fast, secure, and flexible solution. Its capability to manage high traffic loads with minimal resource usage makes it a favorite solution for developers and system operators.
Furthermore, Nginx’s capabilities extend beyond basics, and you can continue to expand this setup to suit more complex needs.